Sherwood Shelving uses a Cam Fittings and Dowels to connect our units together. This video shows how installing shelves (Fixed Shelves) during a closet organizer installation is done.
Once all the hardware (dowels & suspension brackets) have been installed on the gables then hang the gables on the rail by measuring out their positions.
Begin installing the top fixed shelves by lifting the shelf above the gable and lowering it into position on the dowels.
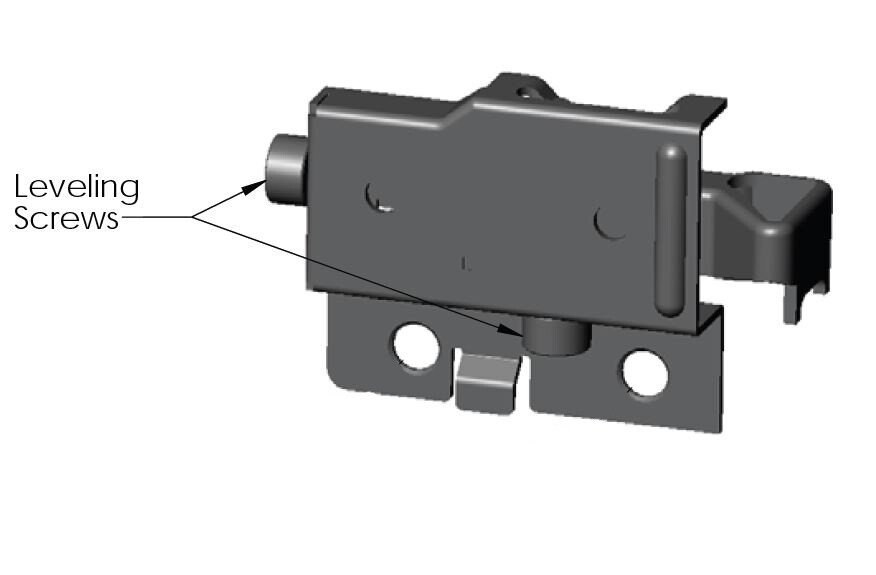
Using a Phillips screwdriver turn the cam fittings clockwise to lock the fixed shelves into position. Never place a fixed shelf in position without turning and locking the cam fitting as the shelf may fall causing damage to you, the shelf, or the house. Work your way along installing all the top fixed shelves first. Once all the top shelves are in position, level each section by turning the adjustment screw on the bottom of the suspension brackets. Doing this step now makes it easier to adjust the up and down adjustment screw on the suspension bracket as there is less weight on it. Another reason for doing this now is there will be no shelving in your way and you can have good access to the suspension bracket.
Once each section has been leveled across the wall, turn the adjustment screws on the back of the suspension bracket to pull the gable securely against the wall. Snug the gable as tight as you can against the wall but do not over tighten the back adjustment screw, this can bend the rail and pull it away from the wall. Making sure all the gables are as tight as possible (sometimes the wall is wavy and there will be gaps) against the wall will reduce the amount of leverages action the gable has to pull away from the wall.
Once all the top shelves are in place and the organizer has been leveled and tightened to the wall, install the remaining fixed shelves. Do this systematically so you are sure you have tightened all the cam fittings especially the fixed shelf below and above a bank of drawers. Failure to tighten these cam fittings will result in drawers falling off their glides and causing possible damage or injury.
CAUTION: Usually the back wall is not perfectly “true” and there will be some gaps between the wall and the shelves or gables. Do not over-tighten the adjustment screw as this will start to pull and bend the steel rail. Only adjust enough to make the unit snug against the wall.
HINT: You need to install and tighten the fixed shelves in the opposite direction you inserted the double dowels (i.e. if you inserted the double dowel through the gable from left to right then you should install the fixed shelves starting from the right and working towards the left.)
Adjustable Shelves
Install shelf supports and adjustable shelves in each section where required. Plastic white shelf supports are most commonly used for white and antique white melamine installations; and clear shelf supports are used for all other colors and wood grains. The advantage of adjustable shelves is that the customer can move the shelf to suite their needs. Typically when installing an organizer, divide the adjustable shelves evenly within the space provided eg. if you are installing 3 adjustable shelves within a shelf hang section measure the space between the top and bottom fixed shelf – approximately 42”. Now divide this space by one more than the number of adjustable shelves – ex. you have 3 adjustable shelves so divide the space by 4. This will give you approximately 10.5” between each shelf. Using your tape measure insert a shelf support into the hole nearest the 10.5” mark. Repeat this process until all the shelf supports have been installed.
HINT: When installing the adjustable shelves hold them on a slight angle (from left to right) and insert them in between the gables then lower into position. You will avoid accidentally hitting a corner or the back of the shelf against a gable and causing damage to the unit.