Sherwood Shelving uses a Wall Rail and Suspension bracket system to install our suspended units. This video will explain the correct process to install Rail & Cap for a Sherwood Shelving closet organizer.
Rail & Cap Height
Mark 82.5” off the floor on the back wall, this will be the height to the bottom of the steel rail. 82.5” is the standard rail height and is the height most frequently used. Some ceilings are high and customers want to take advantage of those high ceilings by installing 8 foot towers, or double hang sections with another shelf above it, etc. Some applications require a special height. The following table gives recommended heights for various installations.
| Style of Installation | Rail Height | Top Shelf Height |
|---|---|---|
|
Regular Height Units |
82.5″ |
86.417″ (2195mm) |
|
8FT High Units |
91.25″ |
95.236″ (2419mm) |
|
Custom Heights |
4″ below top shelf |
4″ above bottom of rail |
Stud Location
Use a stud finder to locate the studs behind the wall and make a small mark – usually just above the 80” height so the rail will cover the mark on either side of the stud. The distance between the two marks indicates the outside edges of the stud which should be approximately 1.5”. This is an important indication of what is behind the wall because if the measurement is smaller or larger it may indicate something other than one stud. Perhaps there are two studs together or something else like an electrical wire or plumbing pipe. One way to help determine if there is a stud is by measuring the distance between what you believe to be studs. Most construction uses 16” from the center of one stud to the center of another stud. Sometimes a 24” center-to-center system is used. This is a very important step that the installer must not rush through. Care should be taken to make sure all the studs are located in order to assure the best possible fastening of the rail to the wall.
Be sure to look on the other side of the wall you are attaching the rail to. Look for any obstacles that could cause a problem if you accidentally screwed into them. A brief list of items would include:
• Electrical Panel: Discovering an electrical panel on the opposite wall indicates there will be many electrical wires within the wall. Extreme caution needs to be taken to make sure you are screwing into a stud.
• Pocket Door: If not careful this could be a disaster especially if it is a glass pocket door.
• Cold Air Return: If there is a cold air return located on either side of the wall, sheet metal used to construct the cold air return could give a false reading on the stud finder. Be careful not to screw into sheet metal thinking it is a stud. You would end up with a very weak spot in the rail and cap which would rip off the wall.
• Inserted Medicine Cabinets/Cupboards: Again, this would give a false reading on a stud finder so make sure you know what you are screwing into.
• Bathrooms/Kitchens: If there is a bathroom or kitchen on the other side of the wall chances are that there will be plumbing pipes within the wall.
• Plumbing Clean-Out: on either side of the wall would indicate a plumbing pipe located behind the wall
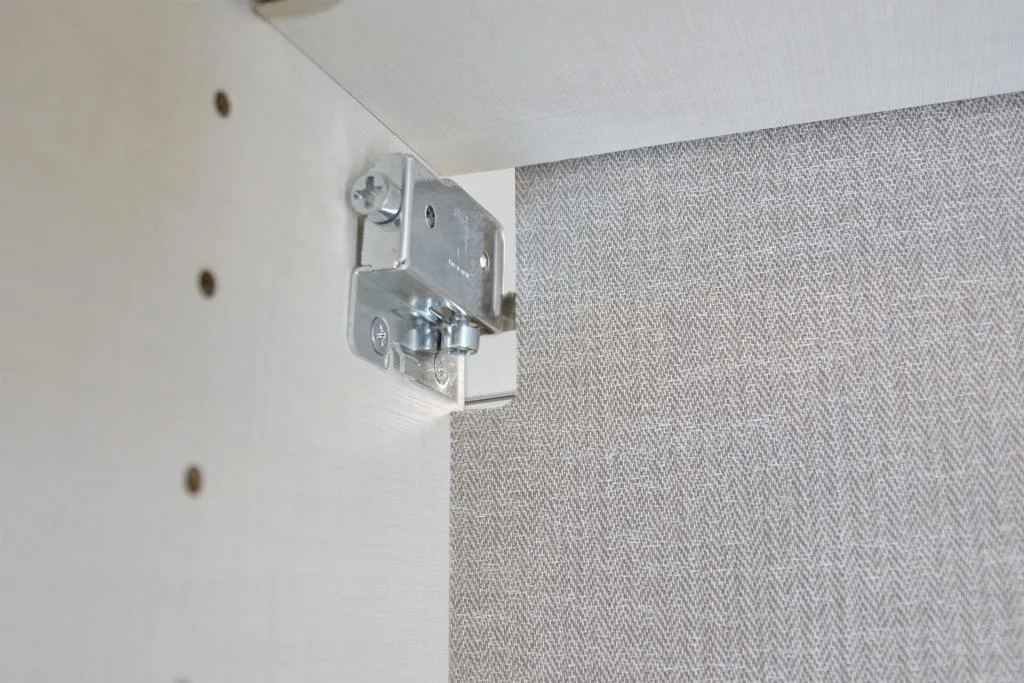
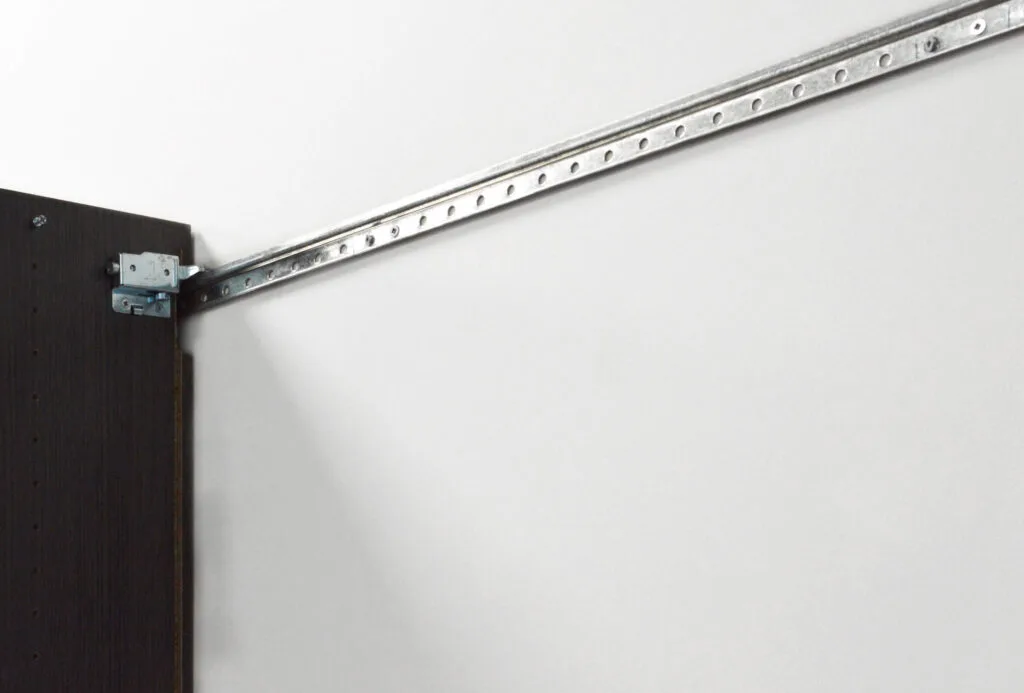
Attaching Rail & Cap
Using a level attach the steel rail to the wall using #8 – 1-1/2” flat head screws (with steel studs use a toggle bolt). You may need to use slightly longer screws if you have trouble catching the studs on each end of the rail in the corners. If the organizer requires a rail longer than 8 feet it is a good practice to adjust the length of the first section of rail so the join will land in the middle of a stud. This will ensure a better and more secure fastening than drywall anchors. If there are no studs at the end of the rail, use an E-Z Anchor or similar product to secure rail ends. If E-Z Anchor’s are used to secure the rail it is a good practice to use two anchors and space them so there is one visible hole between them. This provides more strength when securing the rail to the wall. Once the rail is secure then place the white plastic rail cover onto the rail and snap into place. When two pieces of rail are needed, use the shorter plastic cover on the longer steel rail and the longer plastic cover on the shorter rail, in this way the join between the plastic cover does not line up directly over the steel rail join.