

Installing Closet Organizer Cabinets With Backers
Practical Tips for a Smooth and Accurate Installation
Introduction
Installing backers in closet organizer cabinets is different from installing back panels in traditional kitchen box cabinets. Closet systems often use shared partitions, which means installation requires more precision—and ideally a two-person crew.
This guide outlines recommended techniques, helpful tips, and a step-by-step workflow to make installing backers simple and consistent.
Backer Design Overview
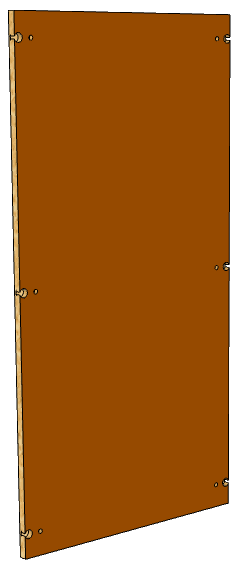
Sherwood Shelving manufactures backers using ¾” TFL in any available finish. Each backer is sized to fit between two gables and is enclosed by a top and bottom fixed shelf.
Important Notes
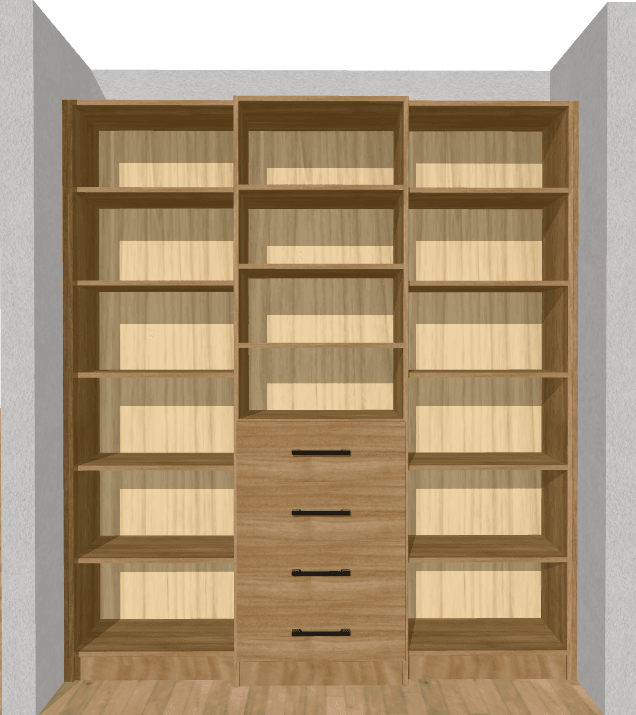
- Backers are not recommended behind drawer banks. They add cost, provide no visual benefit, and force the drawers to be shallower.
- Backers may be ordered with or without cam holes using options in OLO.
- When cams are selected, every backer (regardless of height) receives:
- Two cams at the top
- Two at the center
- Two at the bottom (short backers may omit the center cams)
- When “Backer Holes” are enabled on a gable, the system drills a full 32 mm line, located 9.5 mm in from the back edge.
Installation Process
Before You Begin
- Use a stud finder and mark all stud locations along the installation wall. Record these measurements so you can refer to it. Once the cabinets are staged in front of the wall with the backer installed, you won’t be able to scan again.
- Although one installer can install backer cabinets, two installers are strongly recommended—especially for tall sections.
Step 1: Assemble the First Cabinet (Left to Right)
- Identify the first and second gables in the run.
- Install the screw-in dowels on:
- The right side of the first gable
- The left side of the second gable
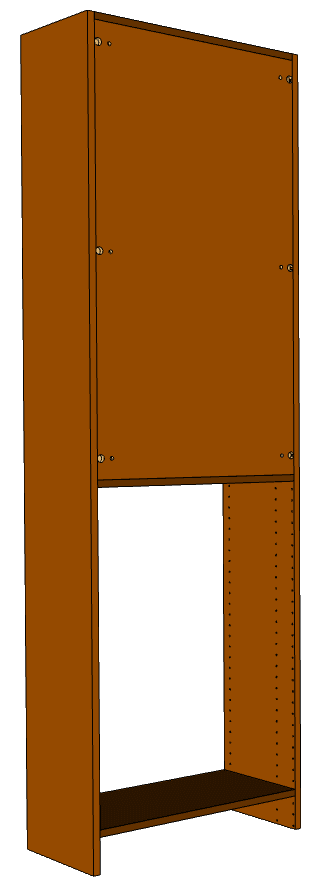
In the example, the backer will go from the top fixed shelf to the bottom fixed shelf. Only install the screw-in dowels for these two shelves.
- With both gables on the floor, connect the top and bottom fixed shelves to create the first cabinet section.
- Carefully lift the assembled unit upright and move it a couple of feet away from the wall.
Step 2: Install the First Backer
- Measure the cam hole placement on the backer so you know where to install the screw-in dowels on the back of the gable.
- Install cam fittings in the backer.
- With the cams facing toward the back wall, bring the backer in from the front of the cabinet.
- Align it between the gables and fixed shelves. The fit is exact—keep it square and avoid forcing it in crooked.
- Have the second installer stabilize the cabinet while the backer slides into place.
- Once seated fully, tighten all cams. (Short backers may only require top and bottom cams.)
The backer will now stiffen the cabinet and reduce racking (side-to-side movement).
Step 3: Install the Left Filler (If Required)
When installing between walls, fillers help compensate for uneven wall surfaces.
Scribe and install the left filler onto the left side of the first gable before moving the cabinet into final position. It is easier to install fillers before the cabinet is against the wall.
Step 4: Position and Secure the First Cabinet
- Move the cabinet into position against the wall.
- Level and plumb the cabinet.
- Install one L-bracket at the top (into a stud) to hold the cabinet in place. You will install more brackets later once the entire run is aligned.
- At final installation, screws may also be added discreetly through the backer.
Step 5: Install the Far Right Cabinet
Repeat the same process used for the first cabinet, with the following differences:
- Do not install a filler yet.
- Once placed loosely in position, install the middle cabinet’s top and bottom fixed shelves temporarily to see how much room remains for the right filler.
- If the back wall is bowed, you may need to adjust spacing by splitting the difference between the left and right cabinets.
Install the Right Filler
- Scribe the right filler to the wall.
- Attach the filler to the right gable (a 23-gauge pinner works well).
- Move the cabinet back into its marked position and secure it with one L-bracket.
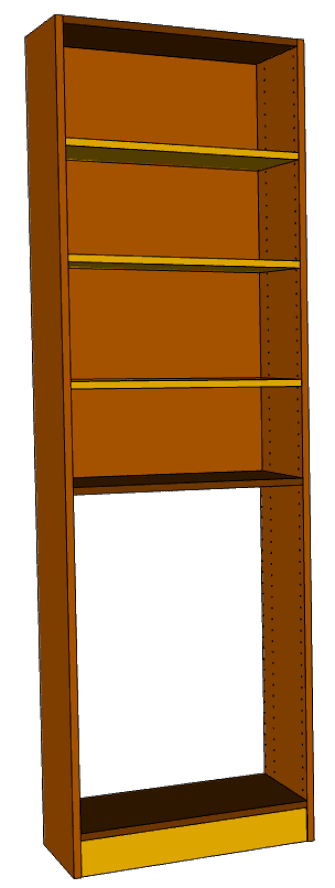
Step 6: Build and Install the Middle Cabinet
The center section will be stick-built in place.
- Install screw-in dowels for the top, middle, and bottom fixed shelves between the two installed side cabinets. Install these fixed shelves.
- Install screw-in dowels for the backer.
- Slide the backer into place.
Securing the Middle Backer
Because the cams are inaccessible once the cabinet is between walls, use one of these methods:
- Option A: Pin the backer discreetly into the gables using a 23-gauge pinner.
- Option B: Apply construction adhesive (e.g., Liquid Nails) to the wall—four corners and one center dot where the backer will go. The cams and dowels prevent over-insertion. You should feel resistance as you press the backer into place against the glue.
Step 7: Final Steps
- Install drawers, toe kicks, and any remaining components.
- Do a final check for level, plumb, and alignment across doors, drawers, and shelves.
- Install additional L-brackets at each stud location for long-term stability. Also screw through the backer using inconspicuous locations for added security.
- Clean the cabinets and work area.
Conclusion
Installing backers in closet organizer systems requires patience, planning, and accuracy, especially when working between shared partitions. By assembling sections in the correct order, installing fillers at the right time, and using proper fastening methods, you can achieve a clean, rigid, and professional installation every time.